This heritage turkey, hatched and raised on our farm, weighed just over 11 pounds after cleaning. The turkey was wrapped and chilled in the refrigerator for a day before we started the preparation process. Many will soak turkey in a brine for 24 hours. We decided to rub the bird with moderate amounts of kosher salt and leave it unwrapped in the refrigerator overnight. The next day we set it on the counter several hours before cooking, so it could come up toward room temperature. We then lightly basted it with vegetable oil and rubbed in a mixture of 1/3 Lawry’s Seasoned Salt, 1/3 Adam’s Dry Rub, 1/6 kosher salt, 1/6 black pepper. Again, moderate amounts, not caked on, applied just 30 minutes before going on the smoker. For our 11 pound turkey, we used 6 teaspoons total of the rub mix. We stuffed it about half full with quartered onion, apple, and some garlic.

Next day, rub with kosher salt 24 hours before smoking. The salt will dry the skin and make the coloring irregular. This is normal – it will still be very tender and moist after smoking and roasting.
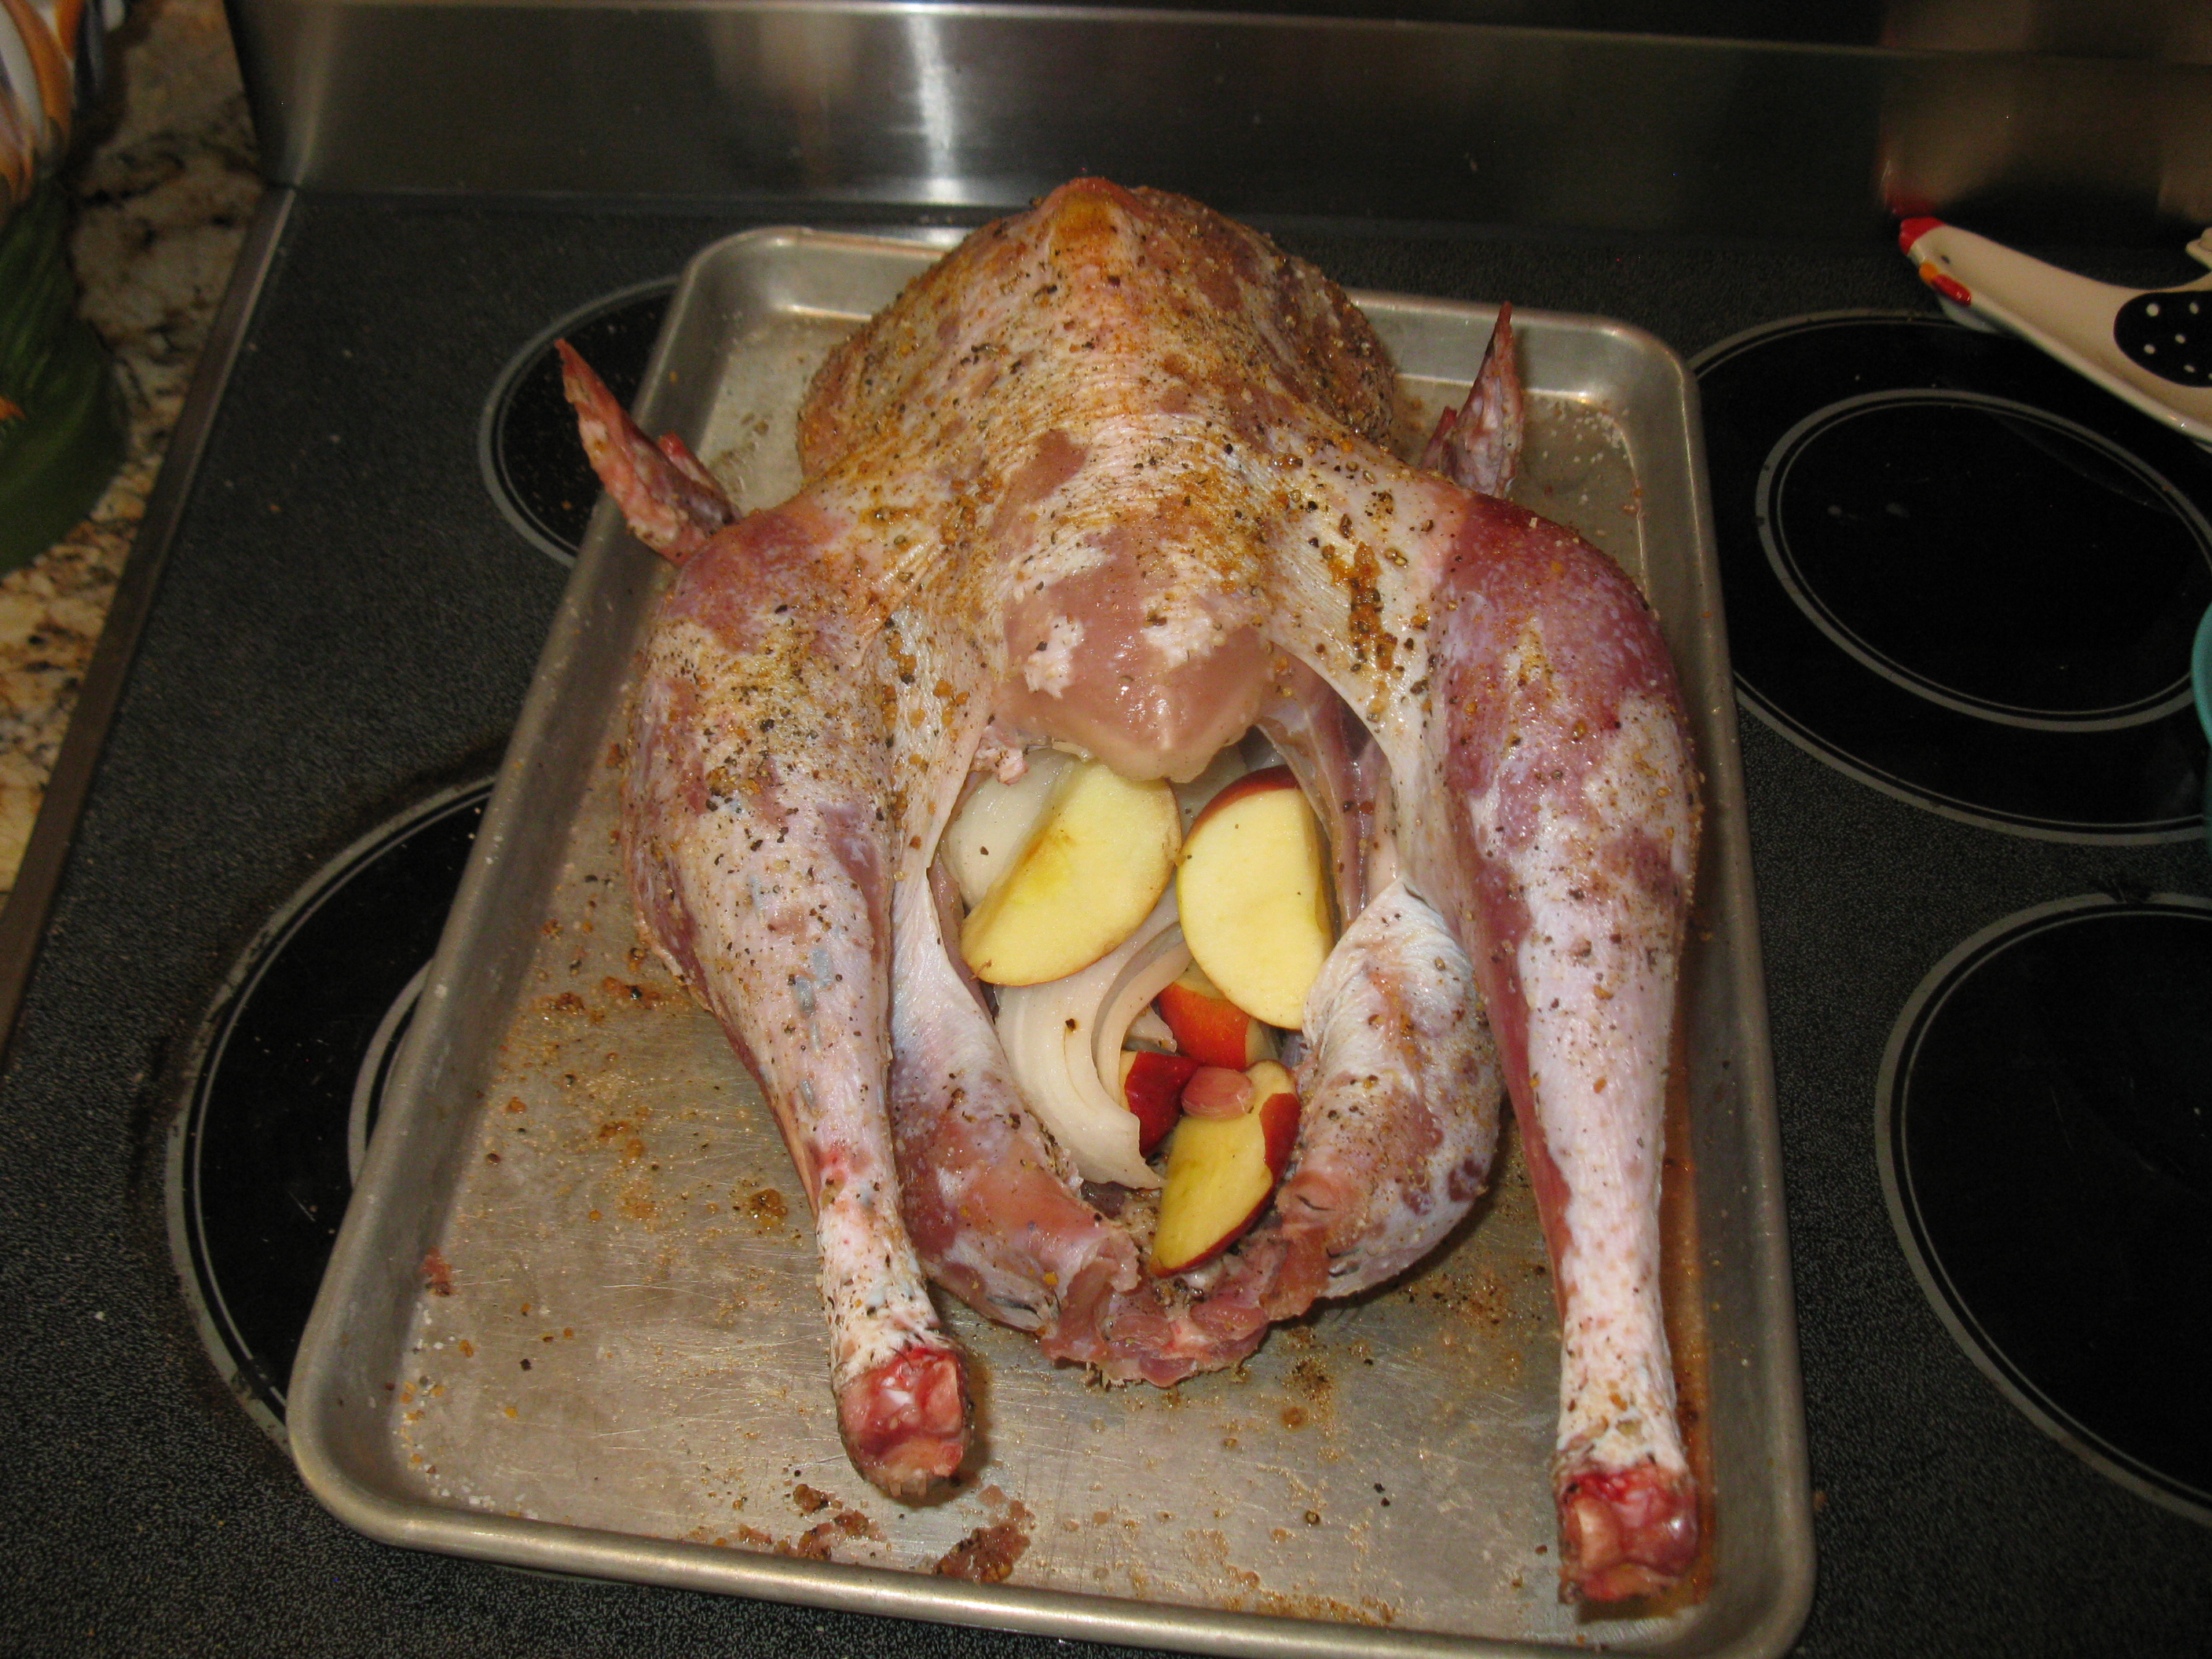
Day of smoking, rub with Lawry’s Seasoned Salt, Adam’s Dry Rub, Black Pepper and a little more Kosher salt. Moderate amounts of seasoning, you can see the bird is not coated heavily. Stuff with quartered large onion, apple, and 10 segments of garlic. Leave room in cavity for air. Note the darker color on the drumstick – this is from the 24 hours of salting and is completely normal.
Before applying the rub, start the fire in your smoker. We use post oak in the offset fire box, letting it burn down to white coals which should give you a grill temperature of around 250 degrees. After the bird is on the grill, baste it lightly again with vegetable oil. As it smokes, watch the temperature and add wood when the temperature gets to 200. That should get it back up to around 250. Our temp fluctuated within this range, as we added wood every 15 minutes or so. The changing temperature was OK, as the bird turned out golden brown, juicy, and very tender yet not mushy.

The smoker is at 300, with fire in the offset firebox. Temp will drop to 240 when bird is put on. Will keep it between 200 and 250 for 2 hours, only opening the lid if the temp gets near 300 to let some heat out.
Here’s the result 2 hours later. The internal temperature was 135. We put it in a roasting pan and covered with foil and baked it in the kitchen oven, 325 degrees.
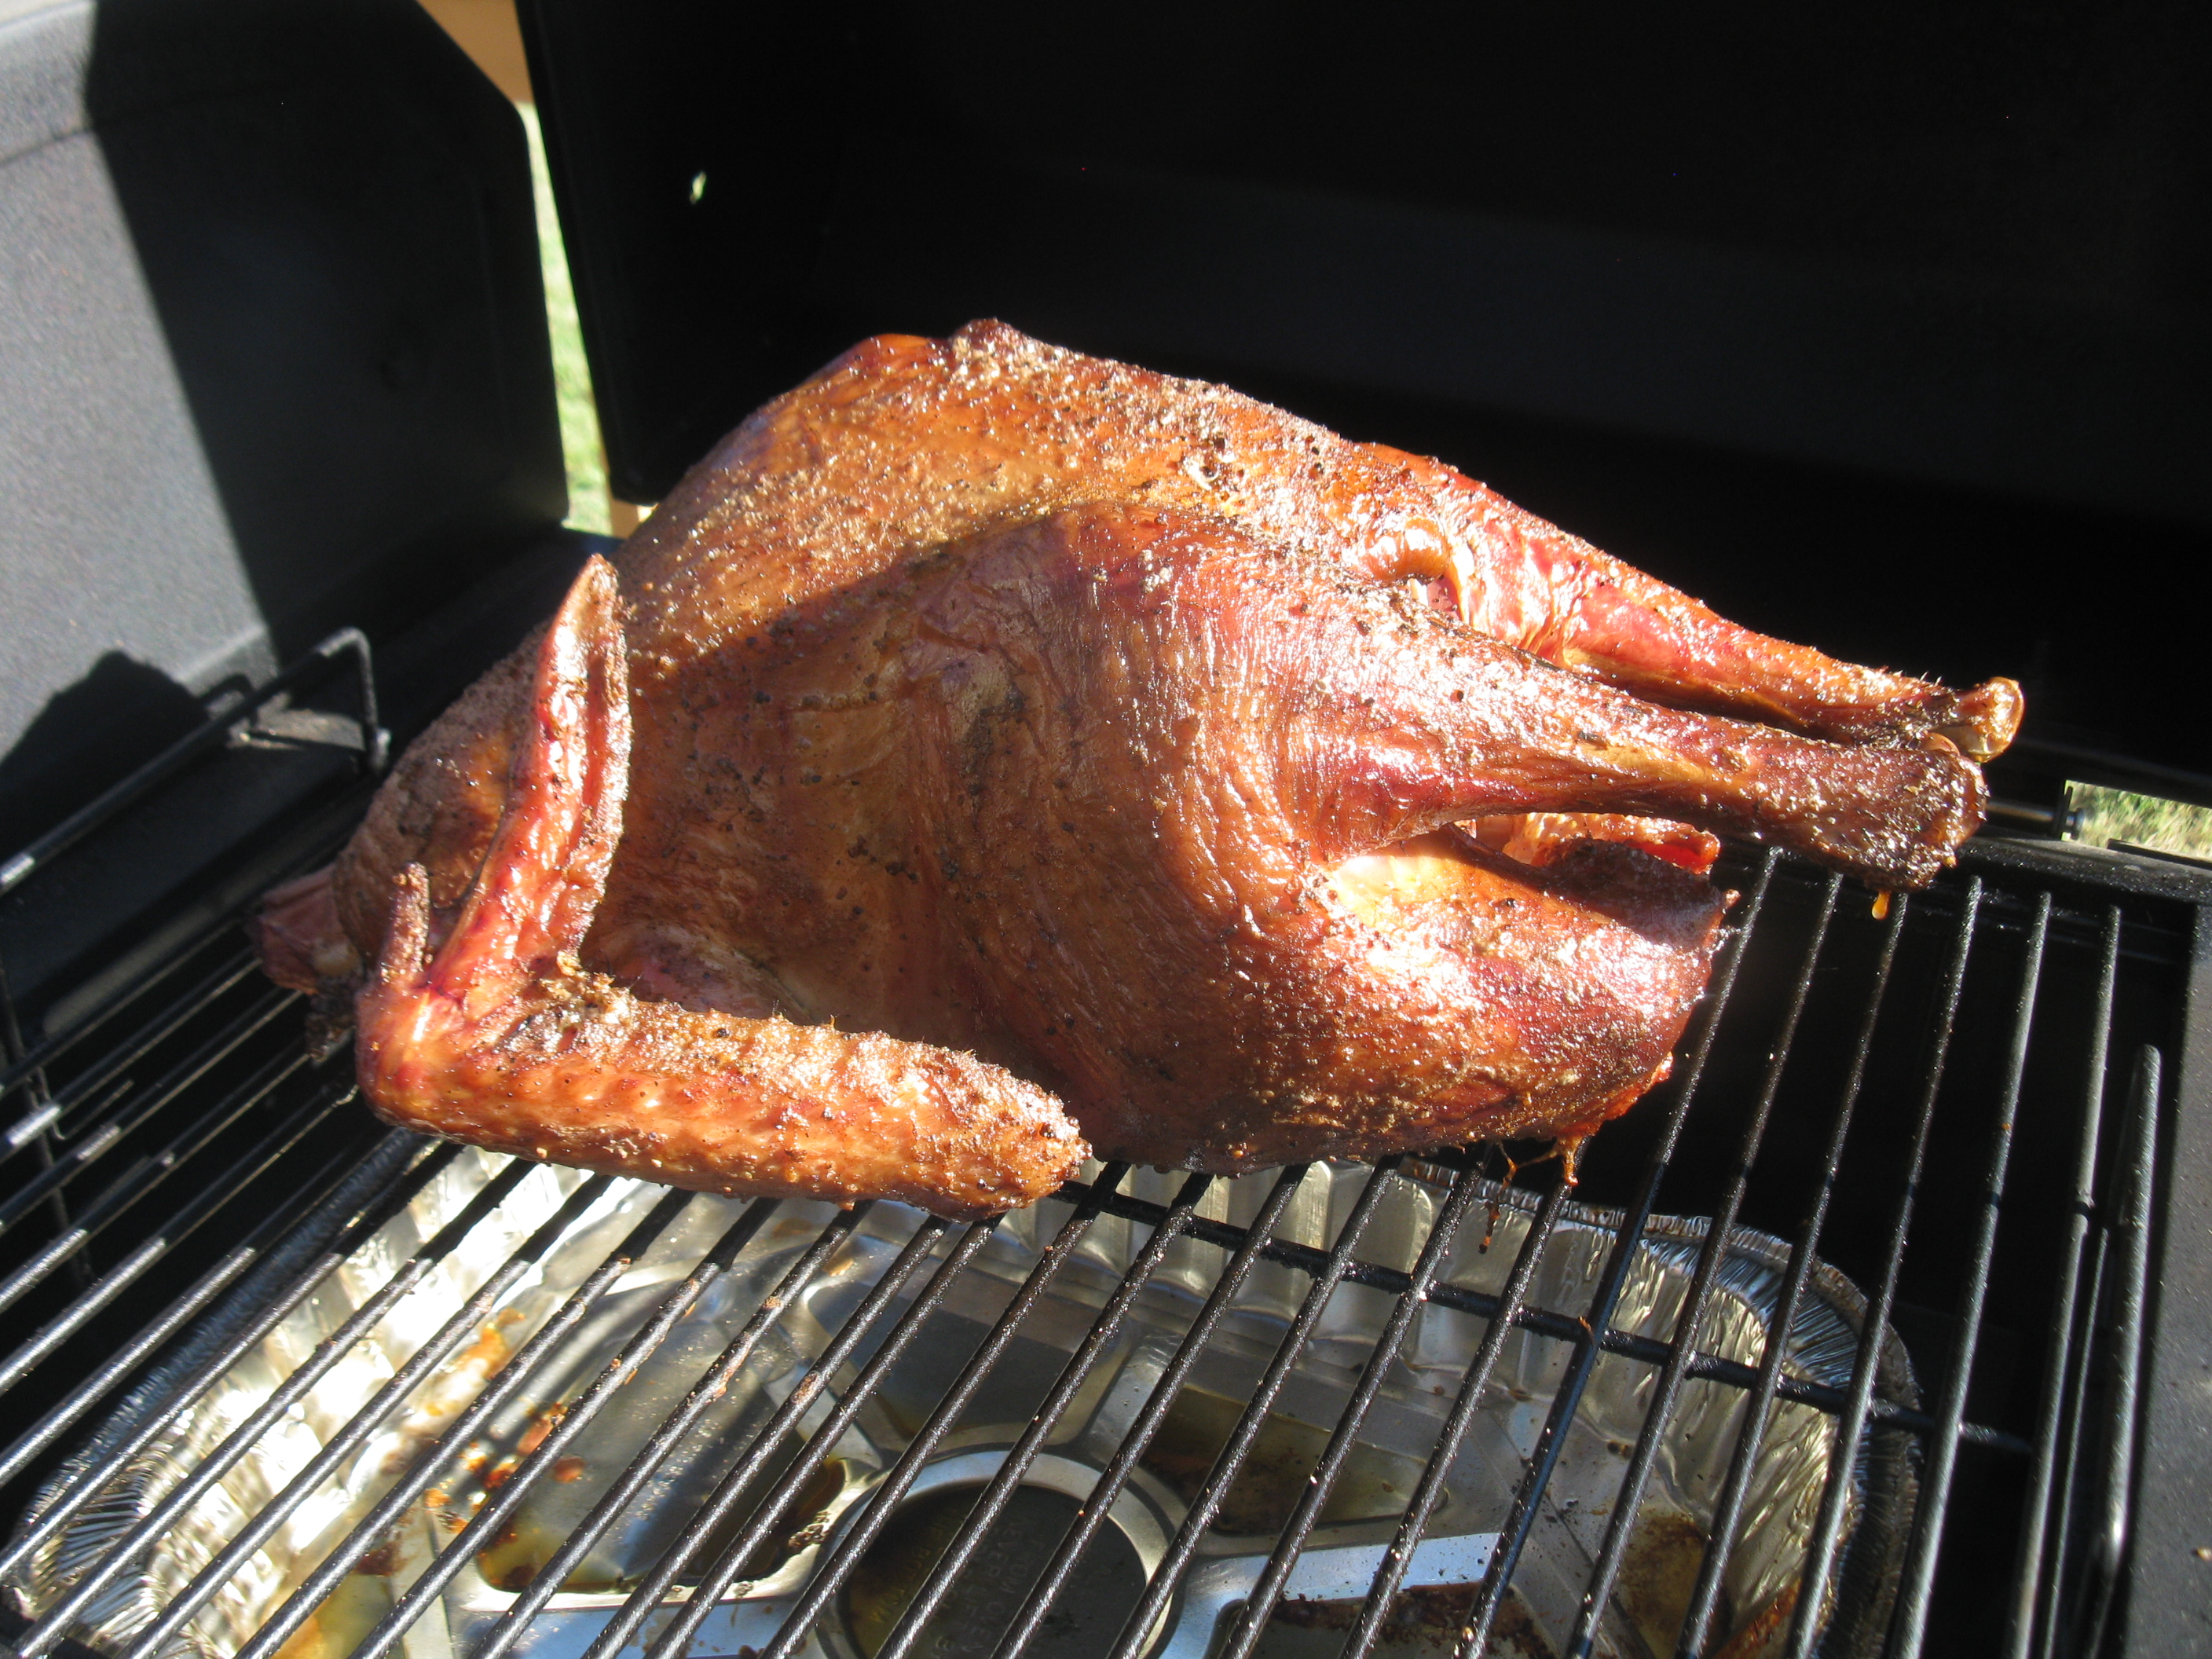
After 2 hours on the smoker, a perfect golden brown

After 2 hours on the smoker, stuffing has cooked down some.
In the roasting pan, just before going to the oven.
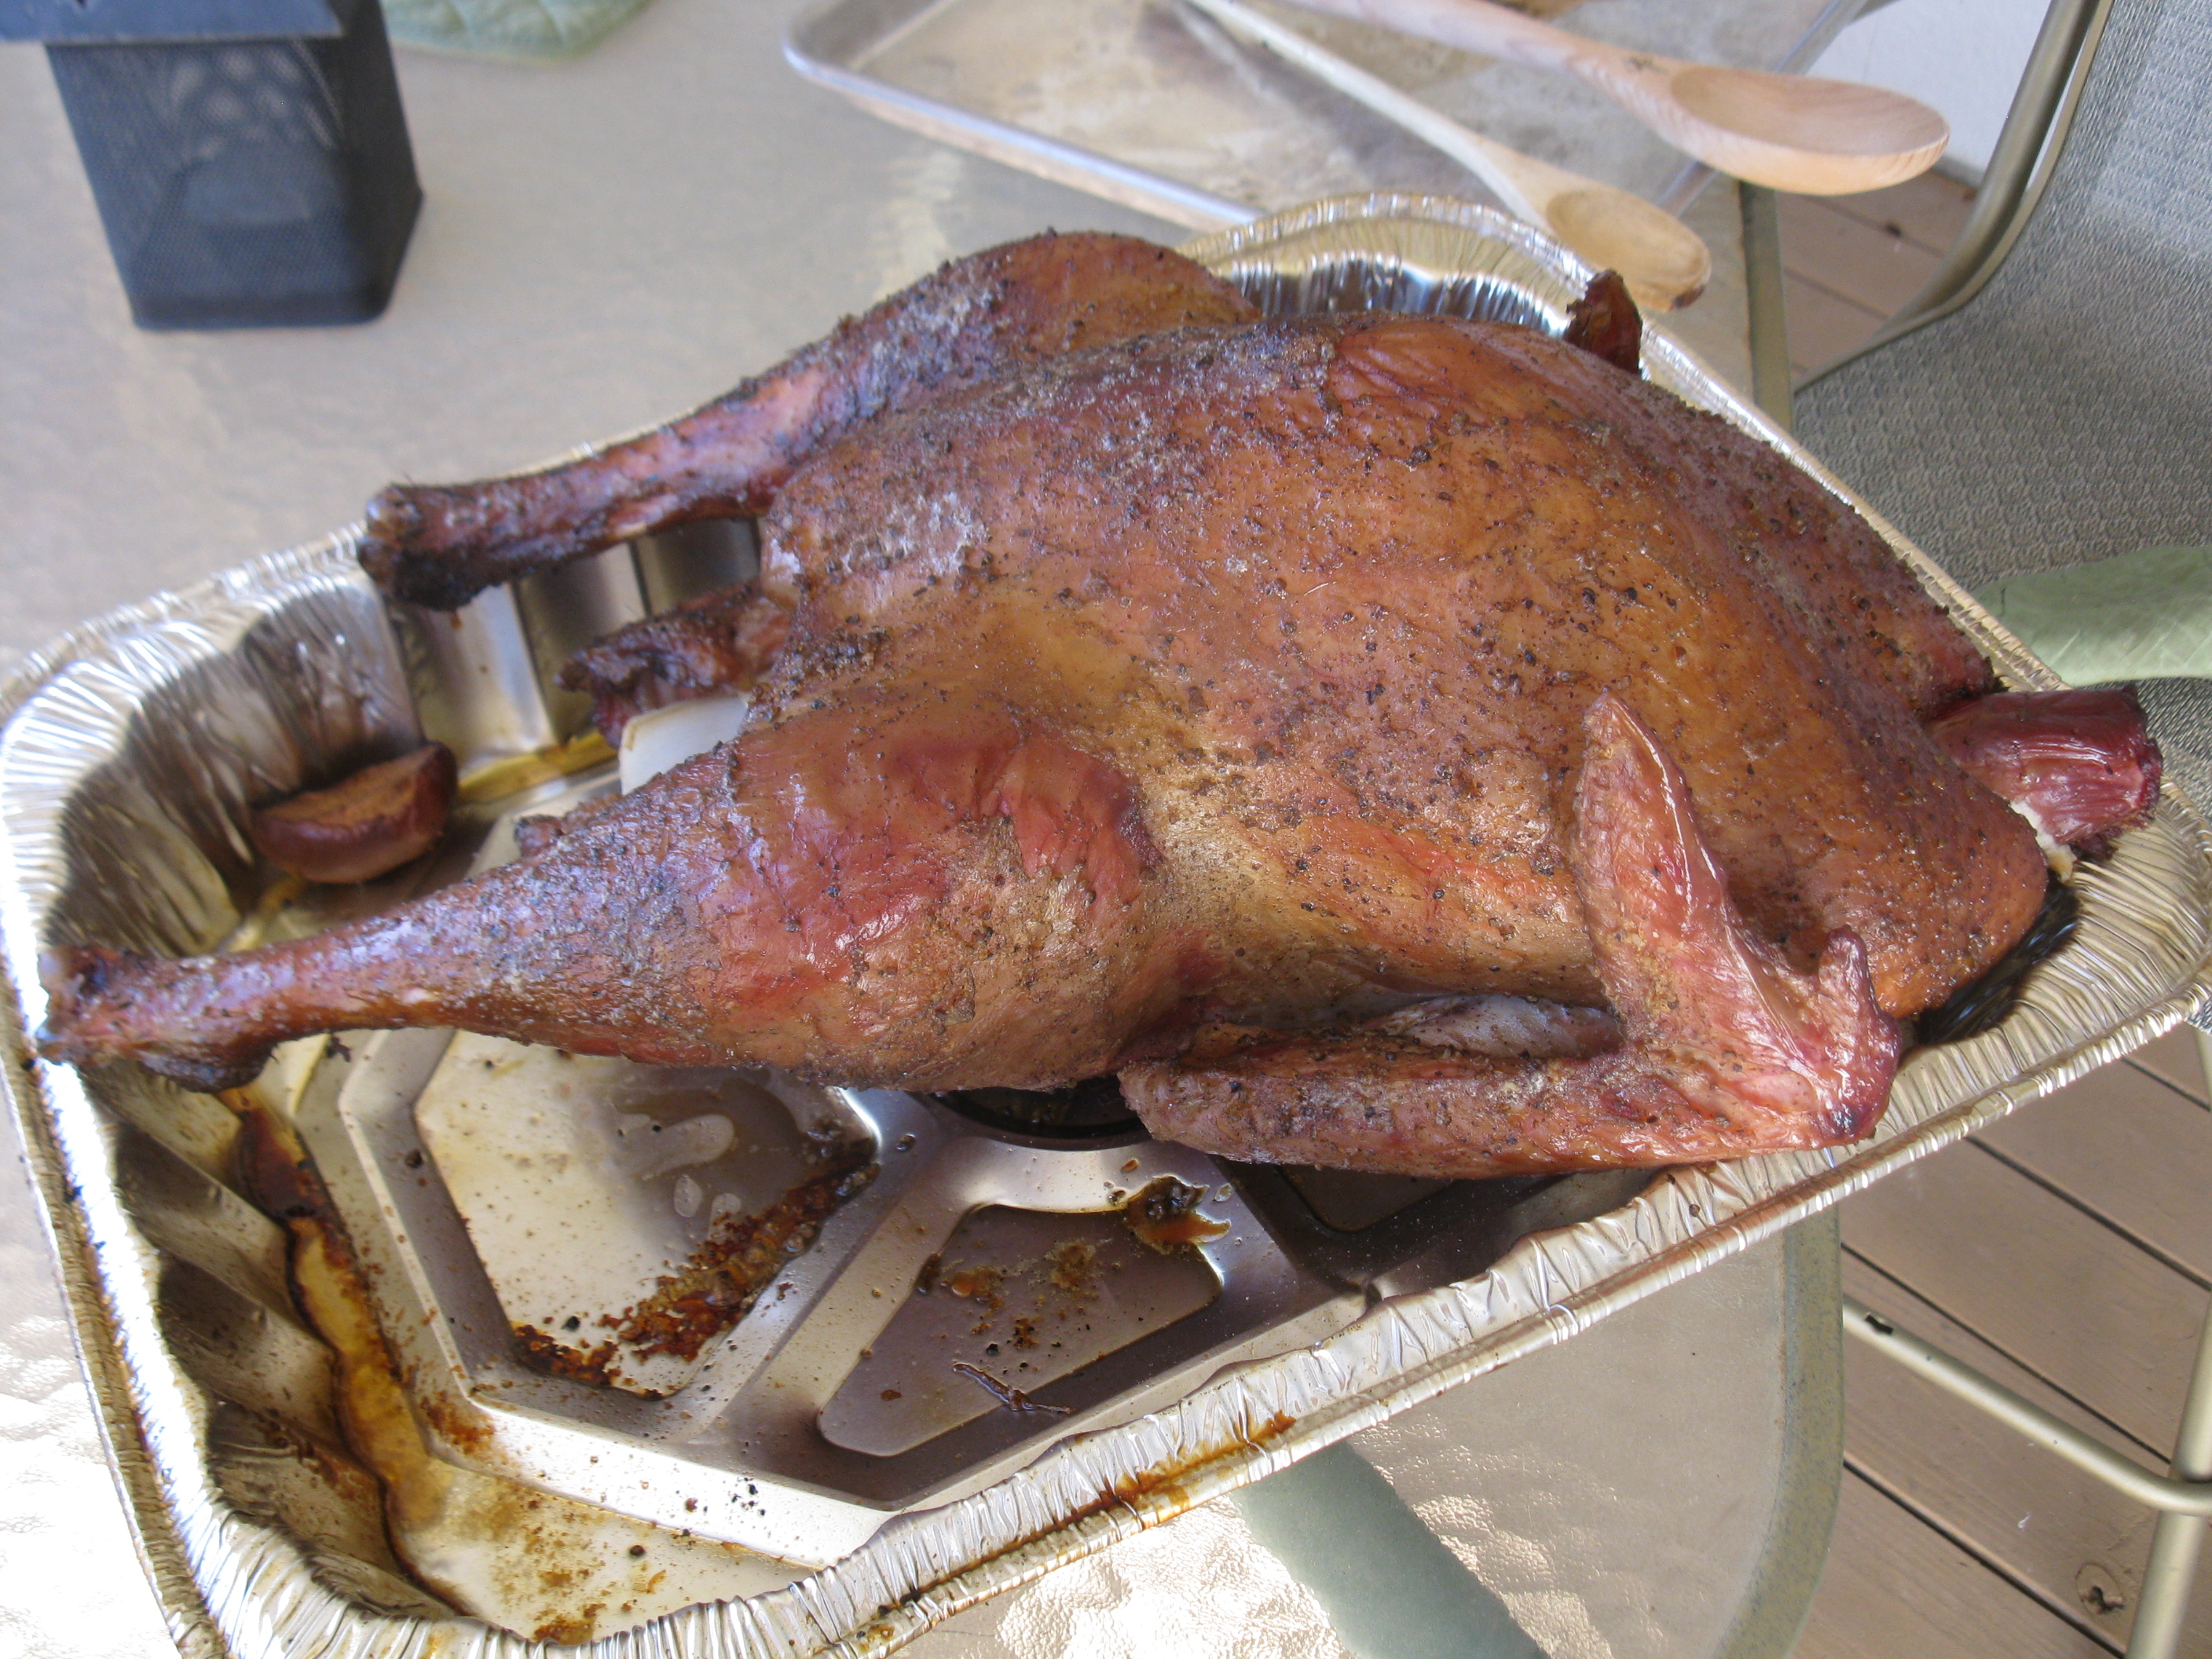
After 90 minutes in the oven, the internal temperature was 155. We left the thermometer in and put the bird back in the oven. About 20 minutes later, it reached 165 we turned off the oven. After another 20 minutes we took it out, checked the temp in various places and found it at 170. (165 is the USDA recommended minimum internal temperature.)
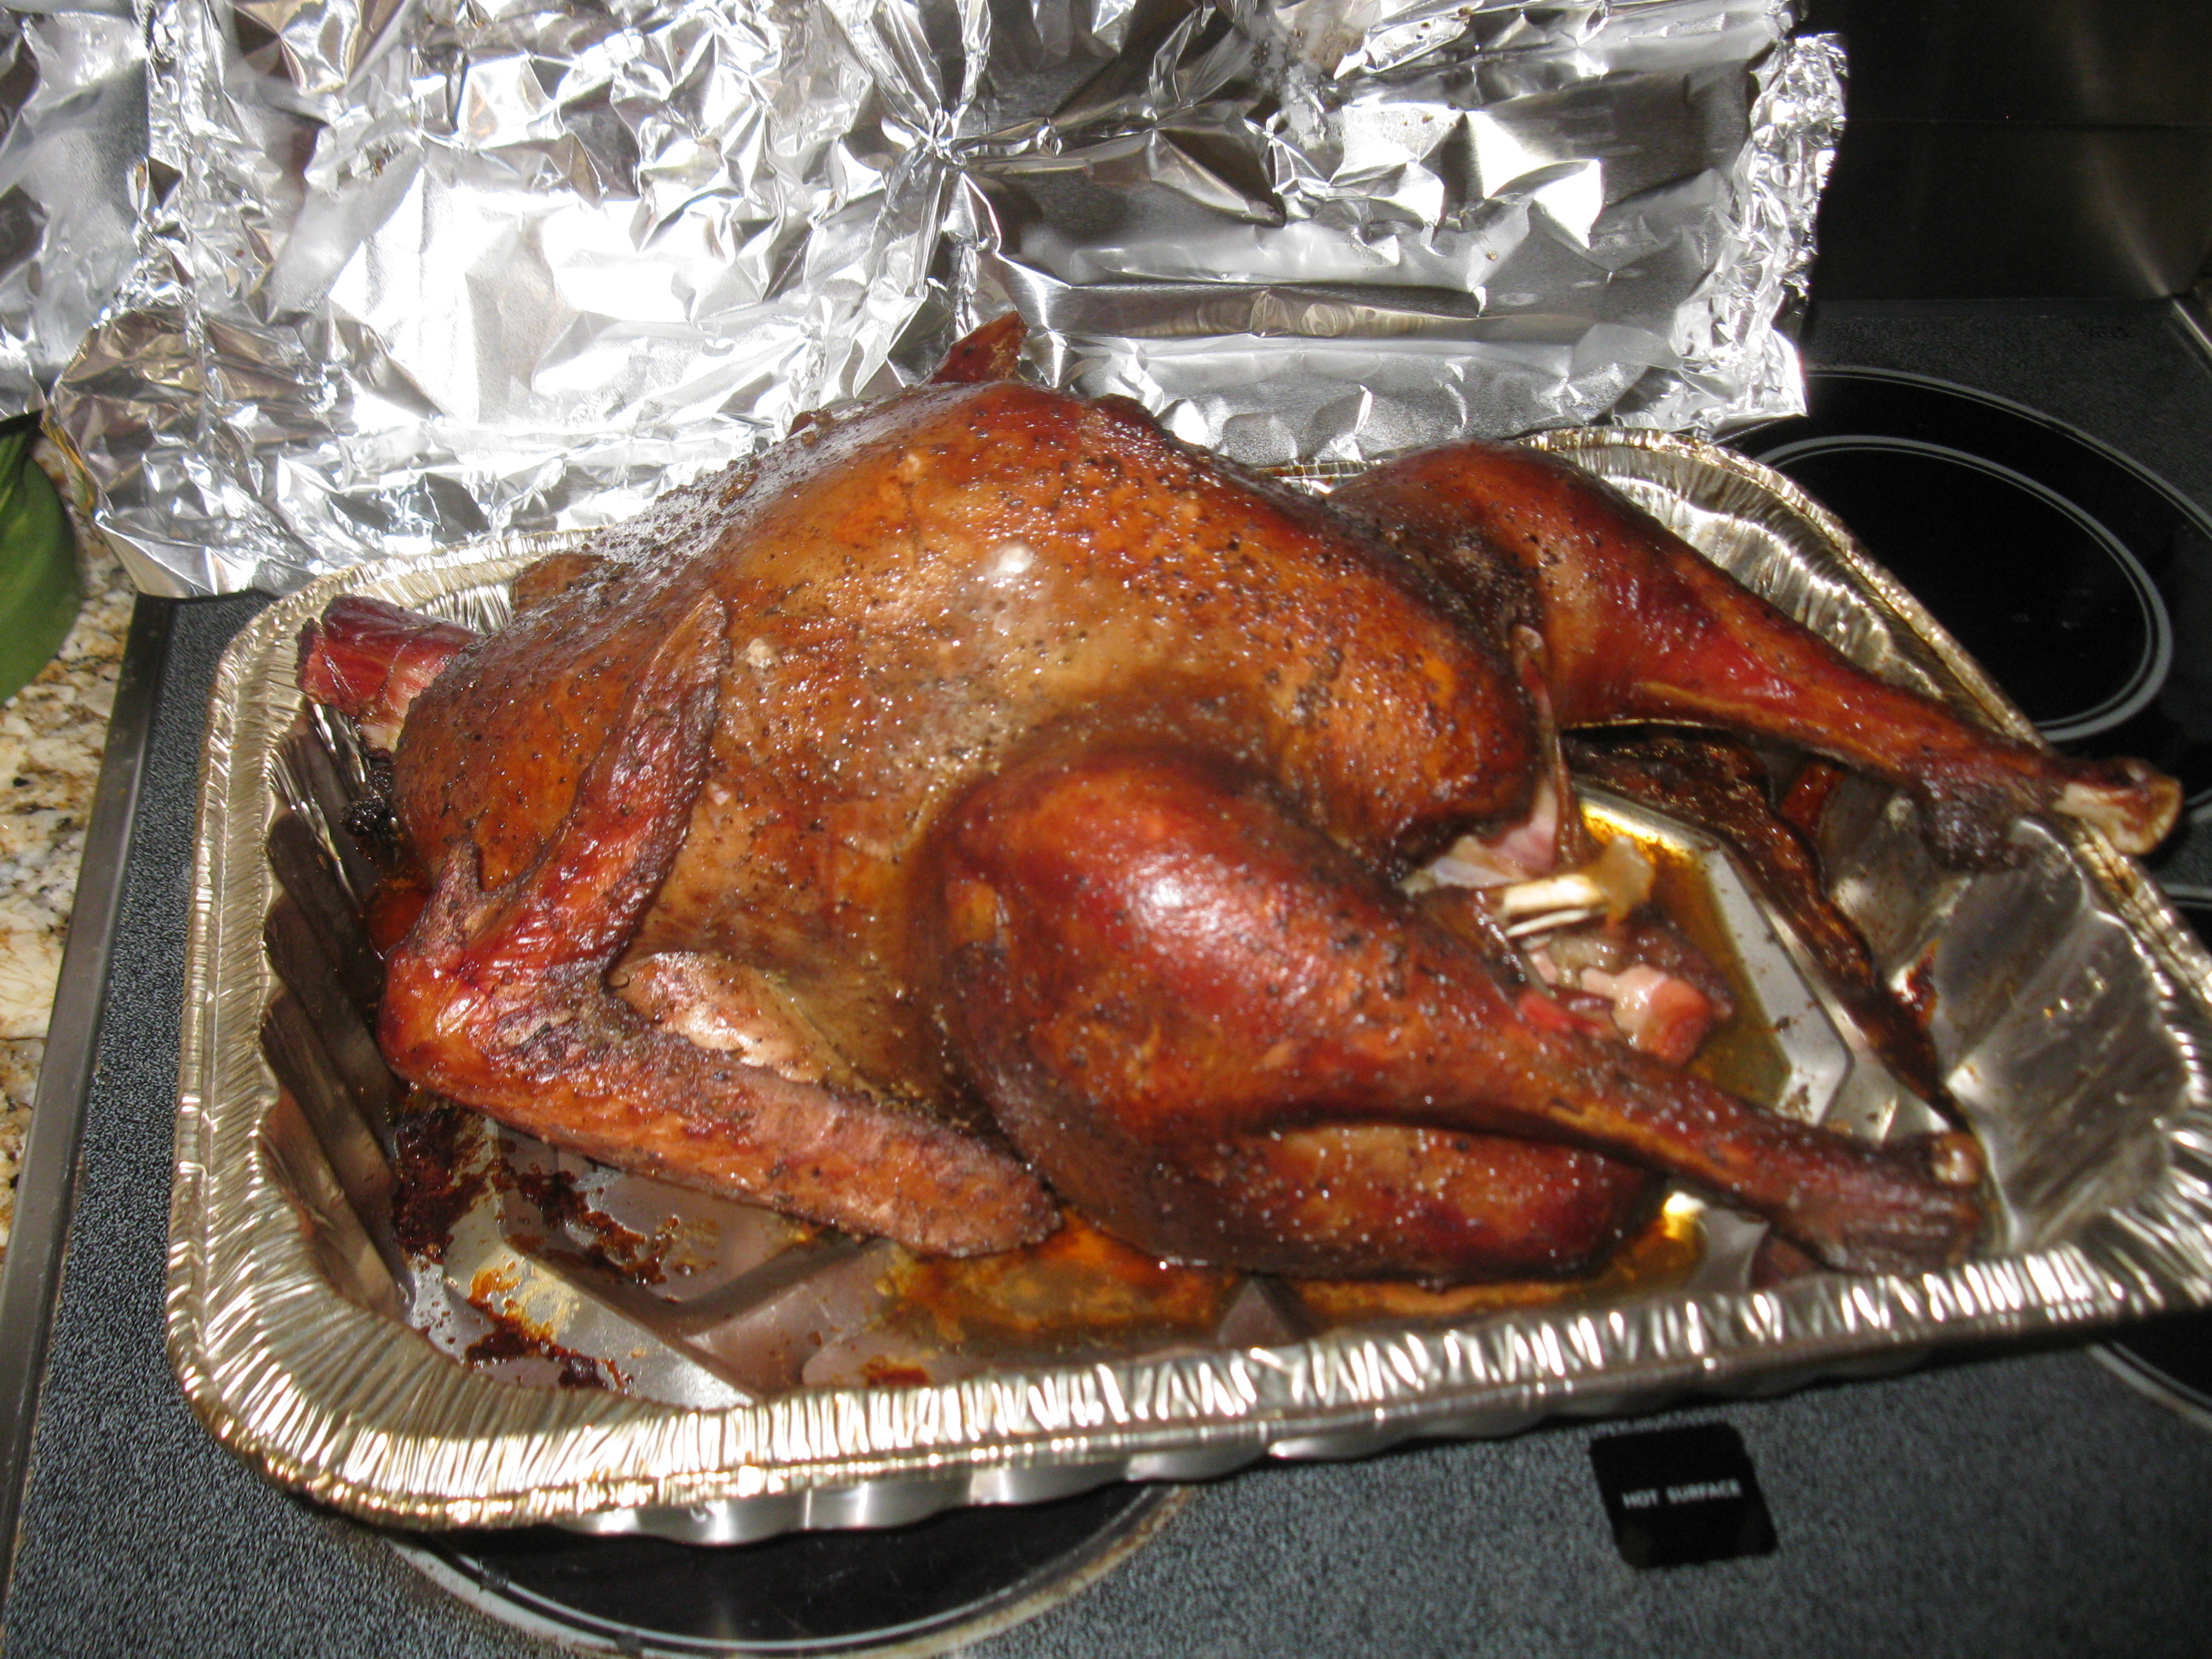
Fully smoked and roasted, ready to carve
An electric knife works great for carving. Started with the thigh/leg, moved to the breast. This was plenty for our meal. After the meal, we took the time to get the rest of the meat from harder to reach places. This turkey fed 14 adults and teens with plenty for another 6 to 8 meals as leftovers. That works out to 1/2 pound of turkey per adult meal. We saved all the bones for making bone broth the next day.
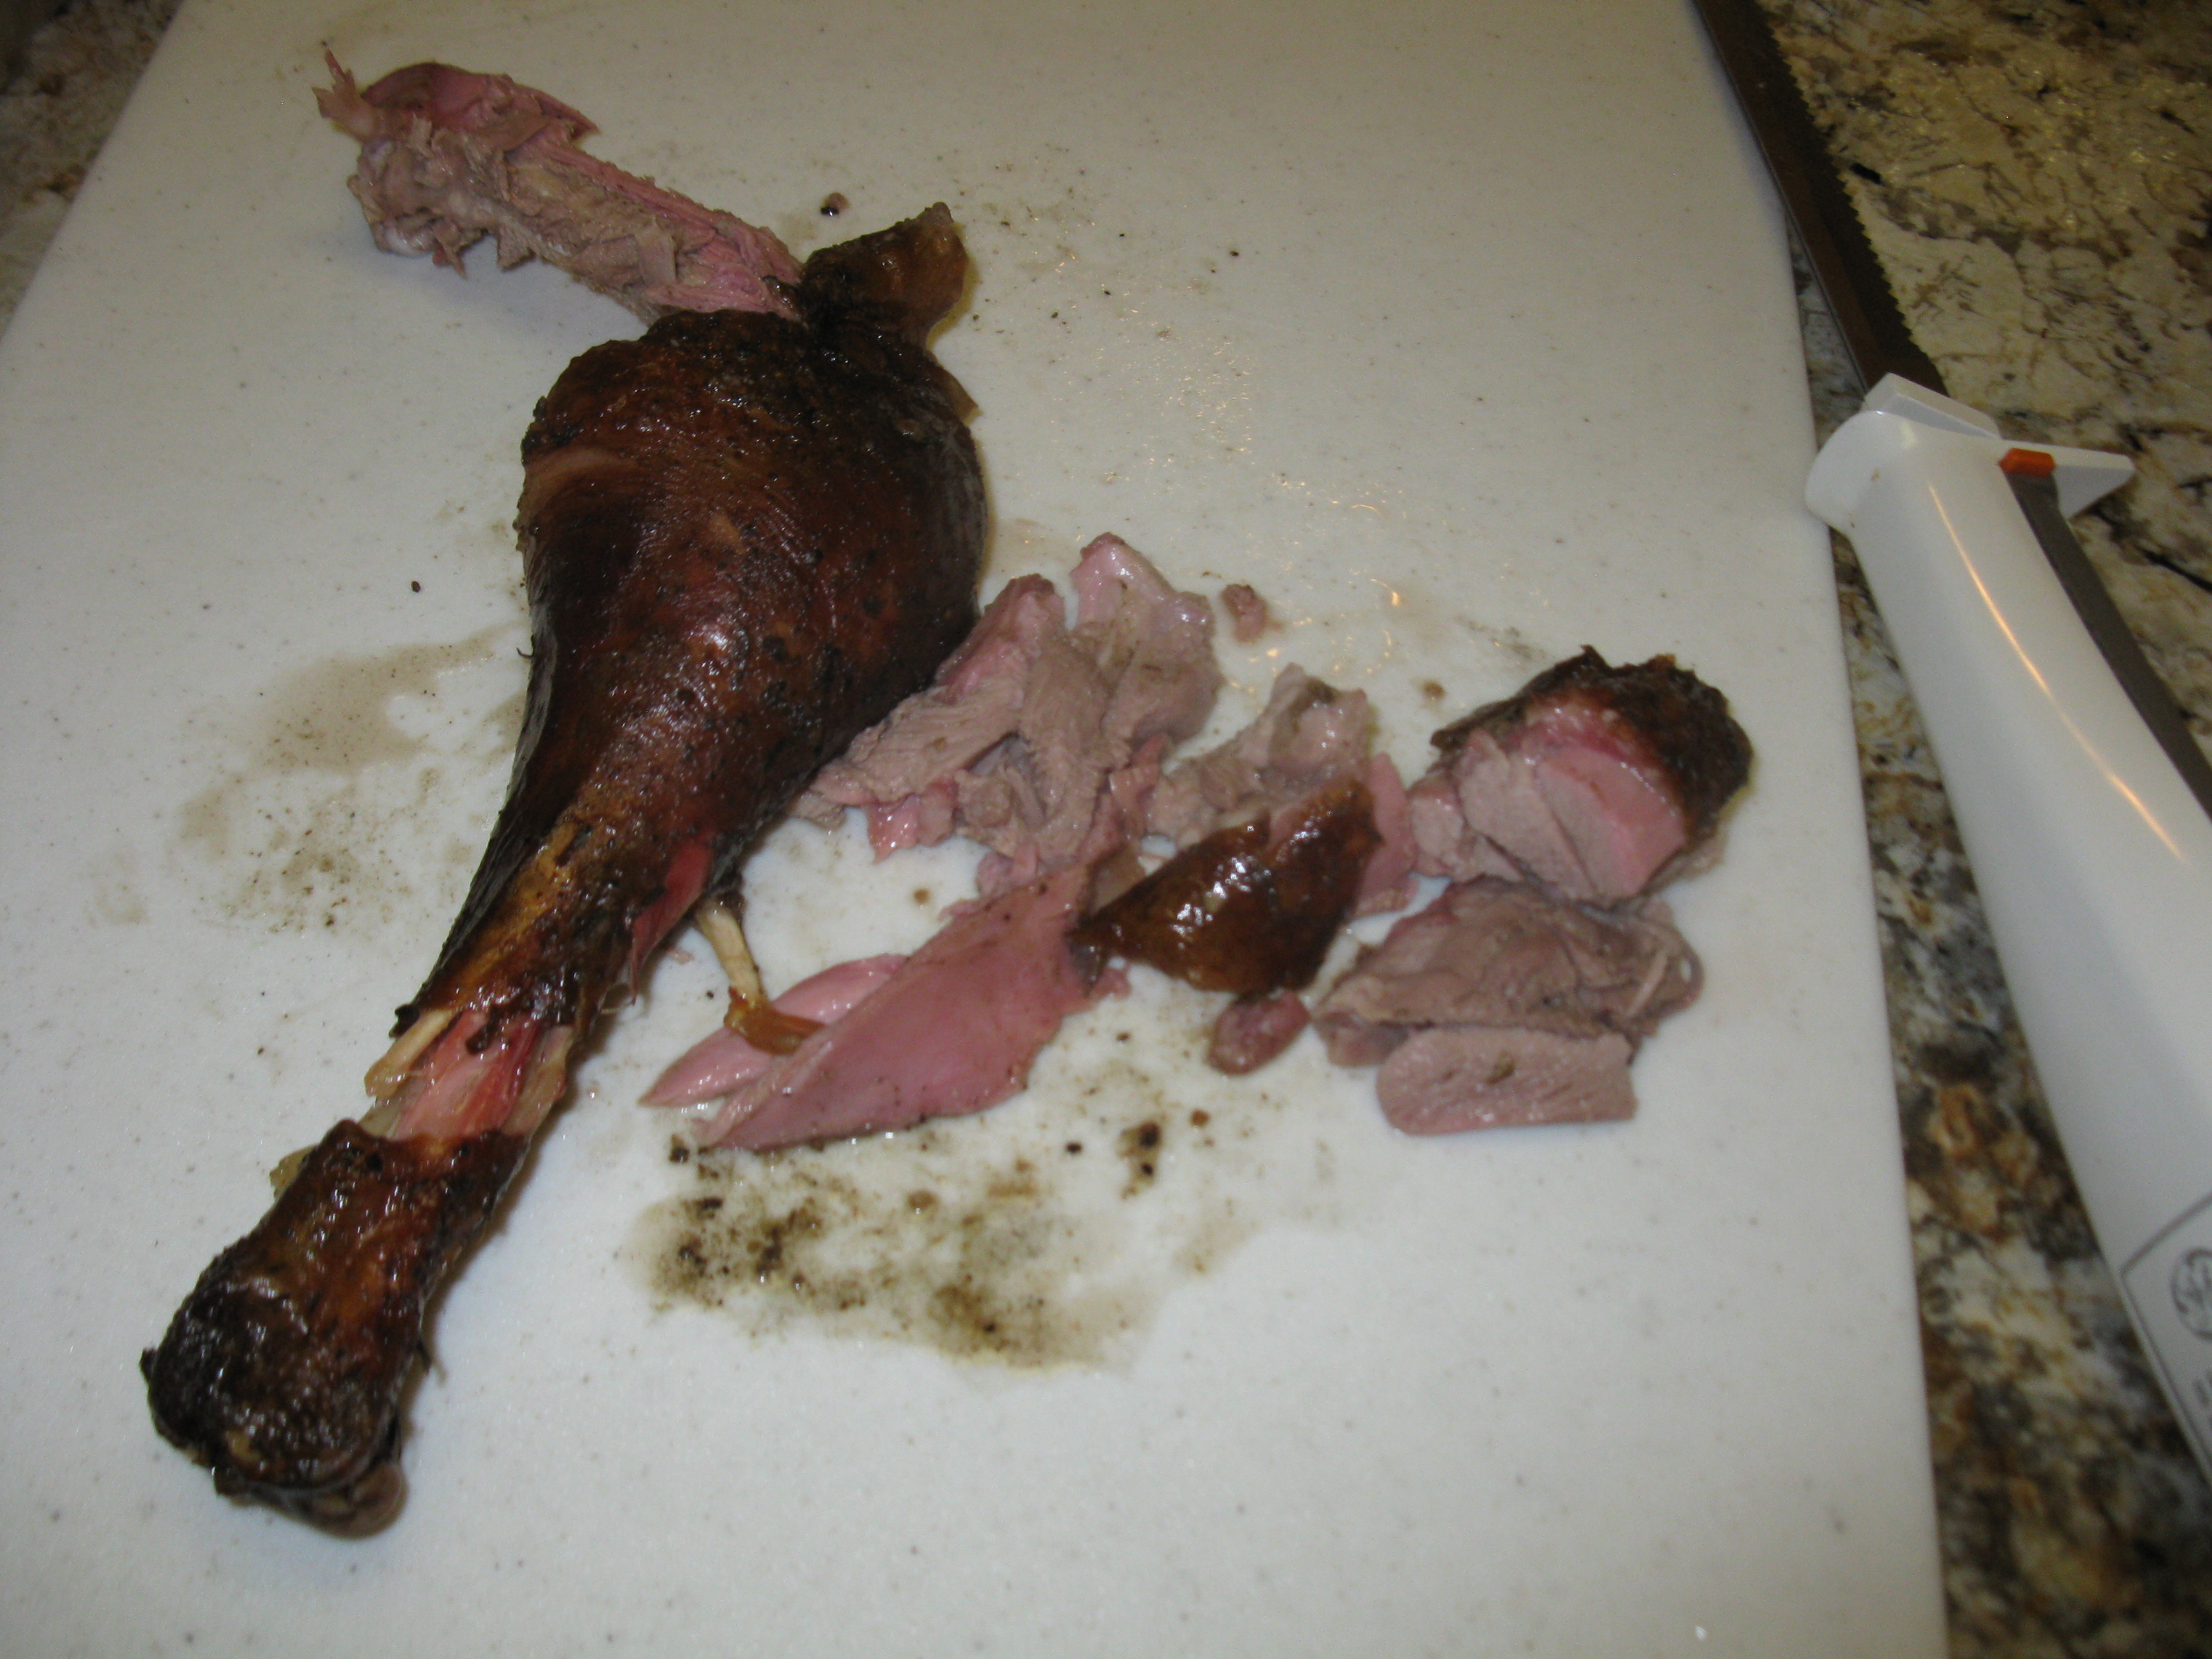
Thigh and leg dark meat. Very tender, great flavor, so juicy!
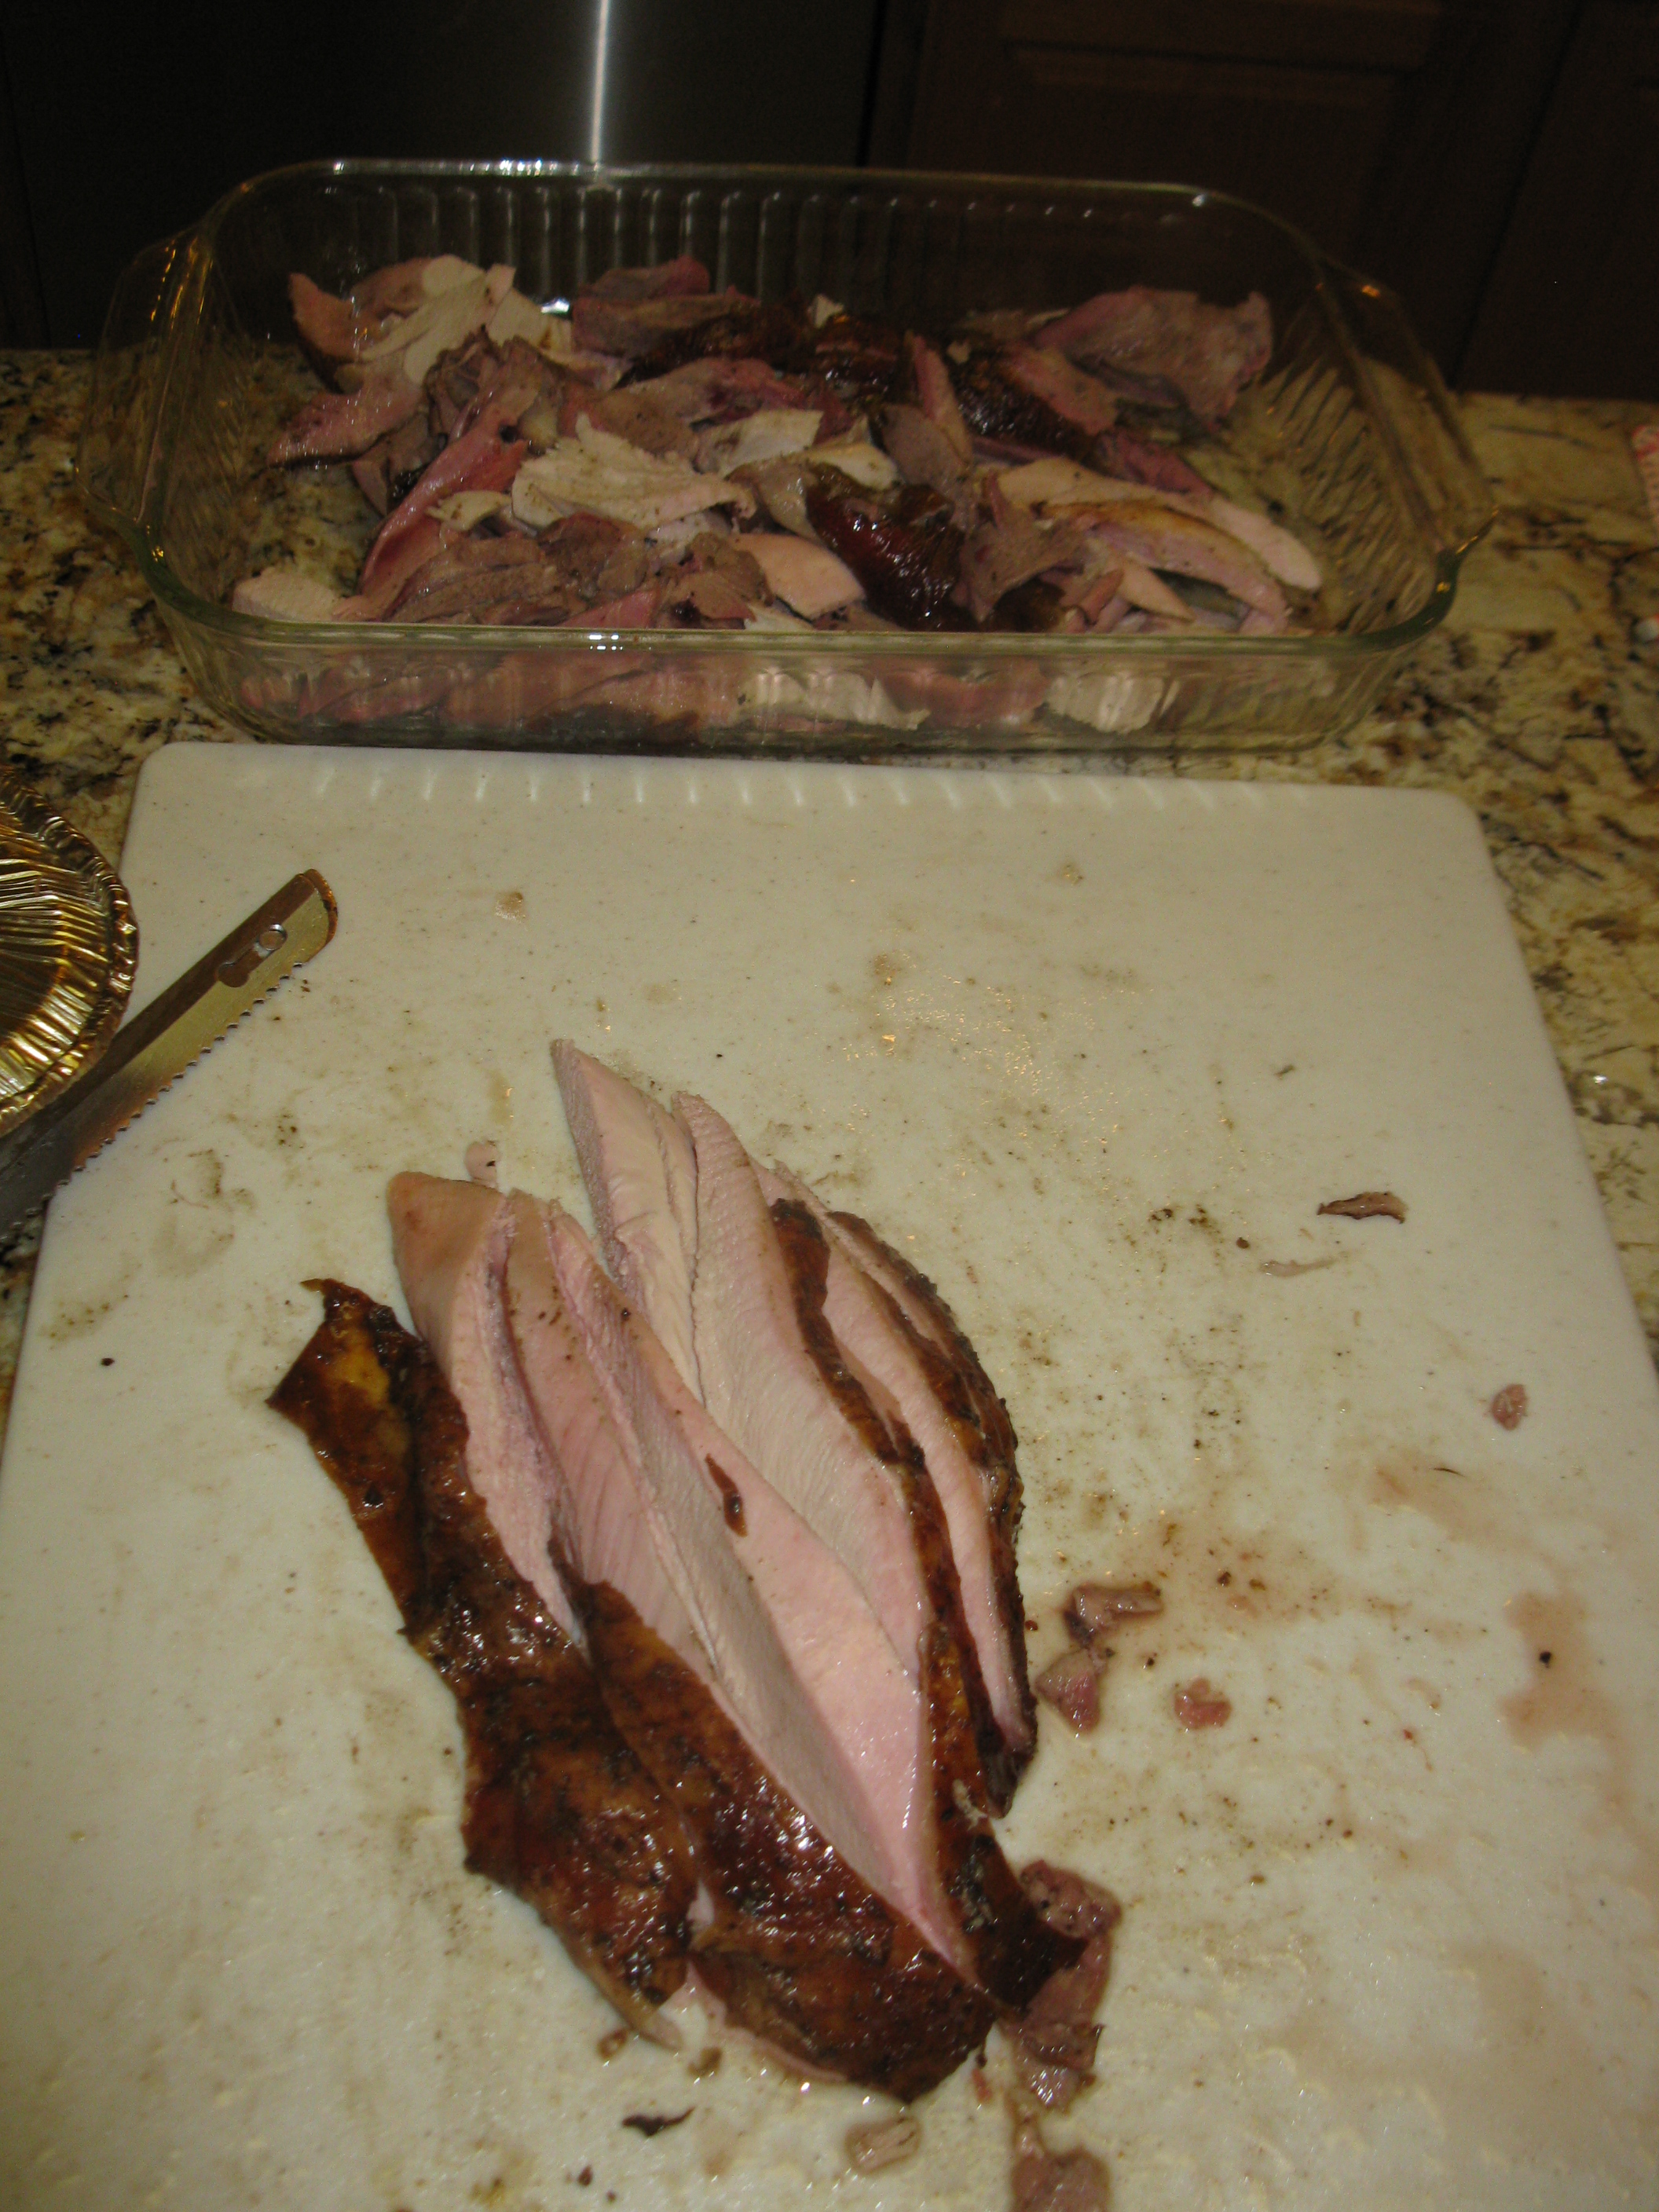
Adding white meat breast to the collection. Also very tender, juicy, not dry. Best I’ve ever had.
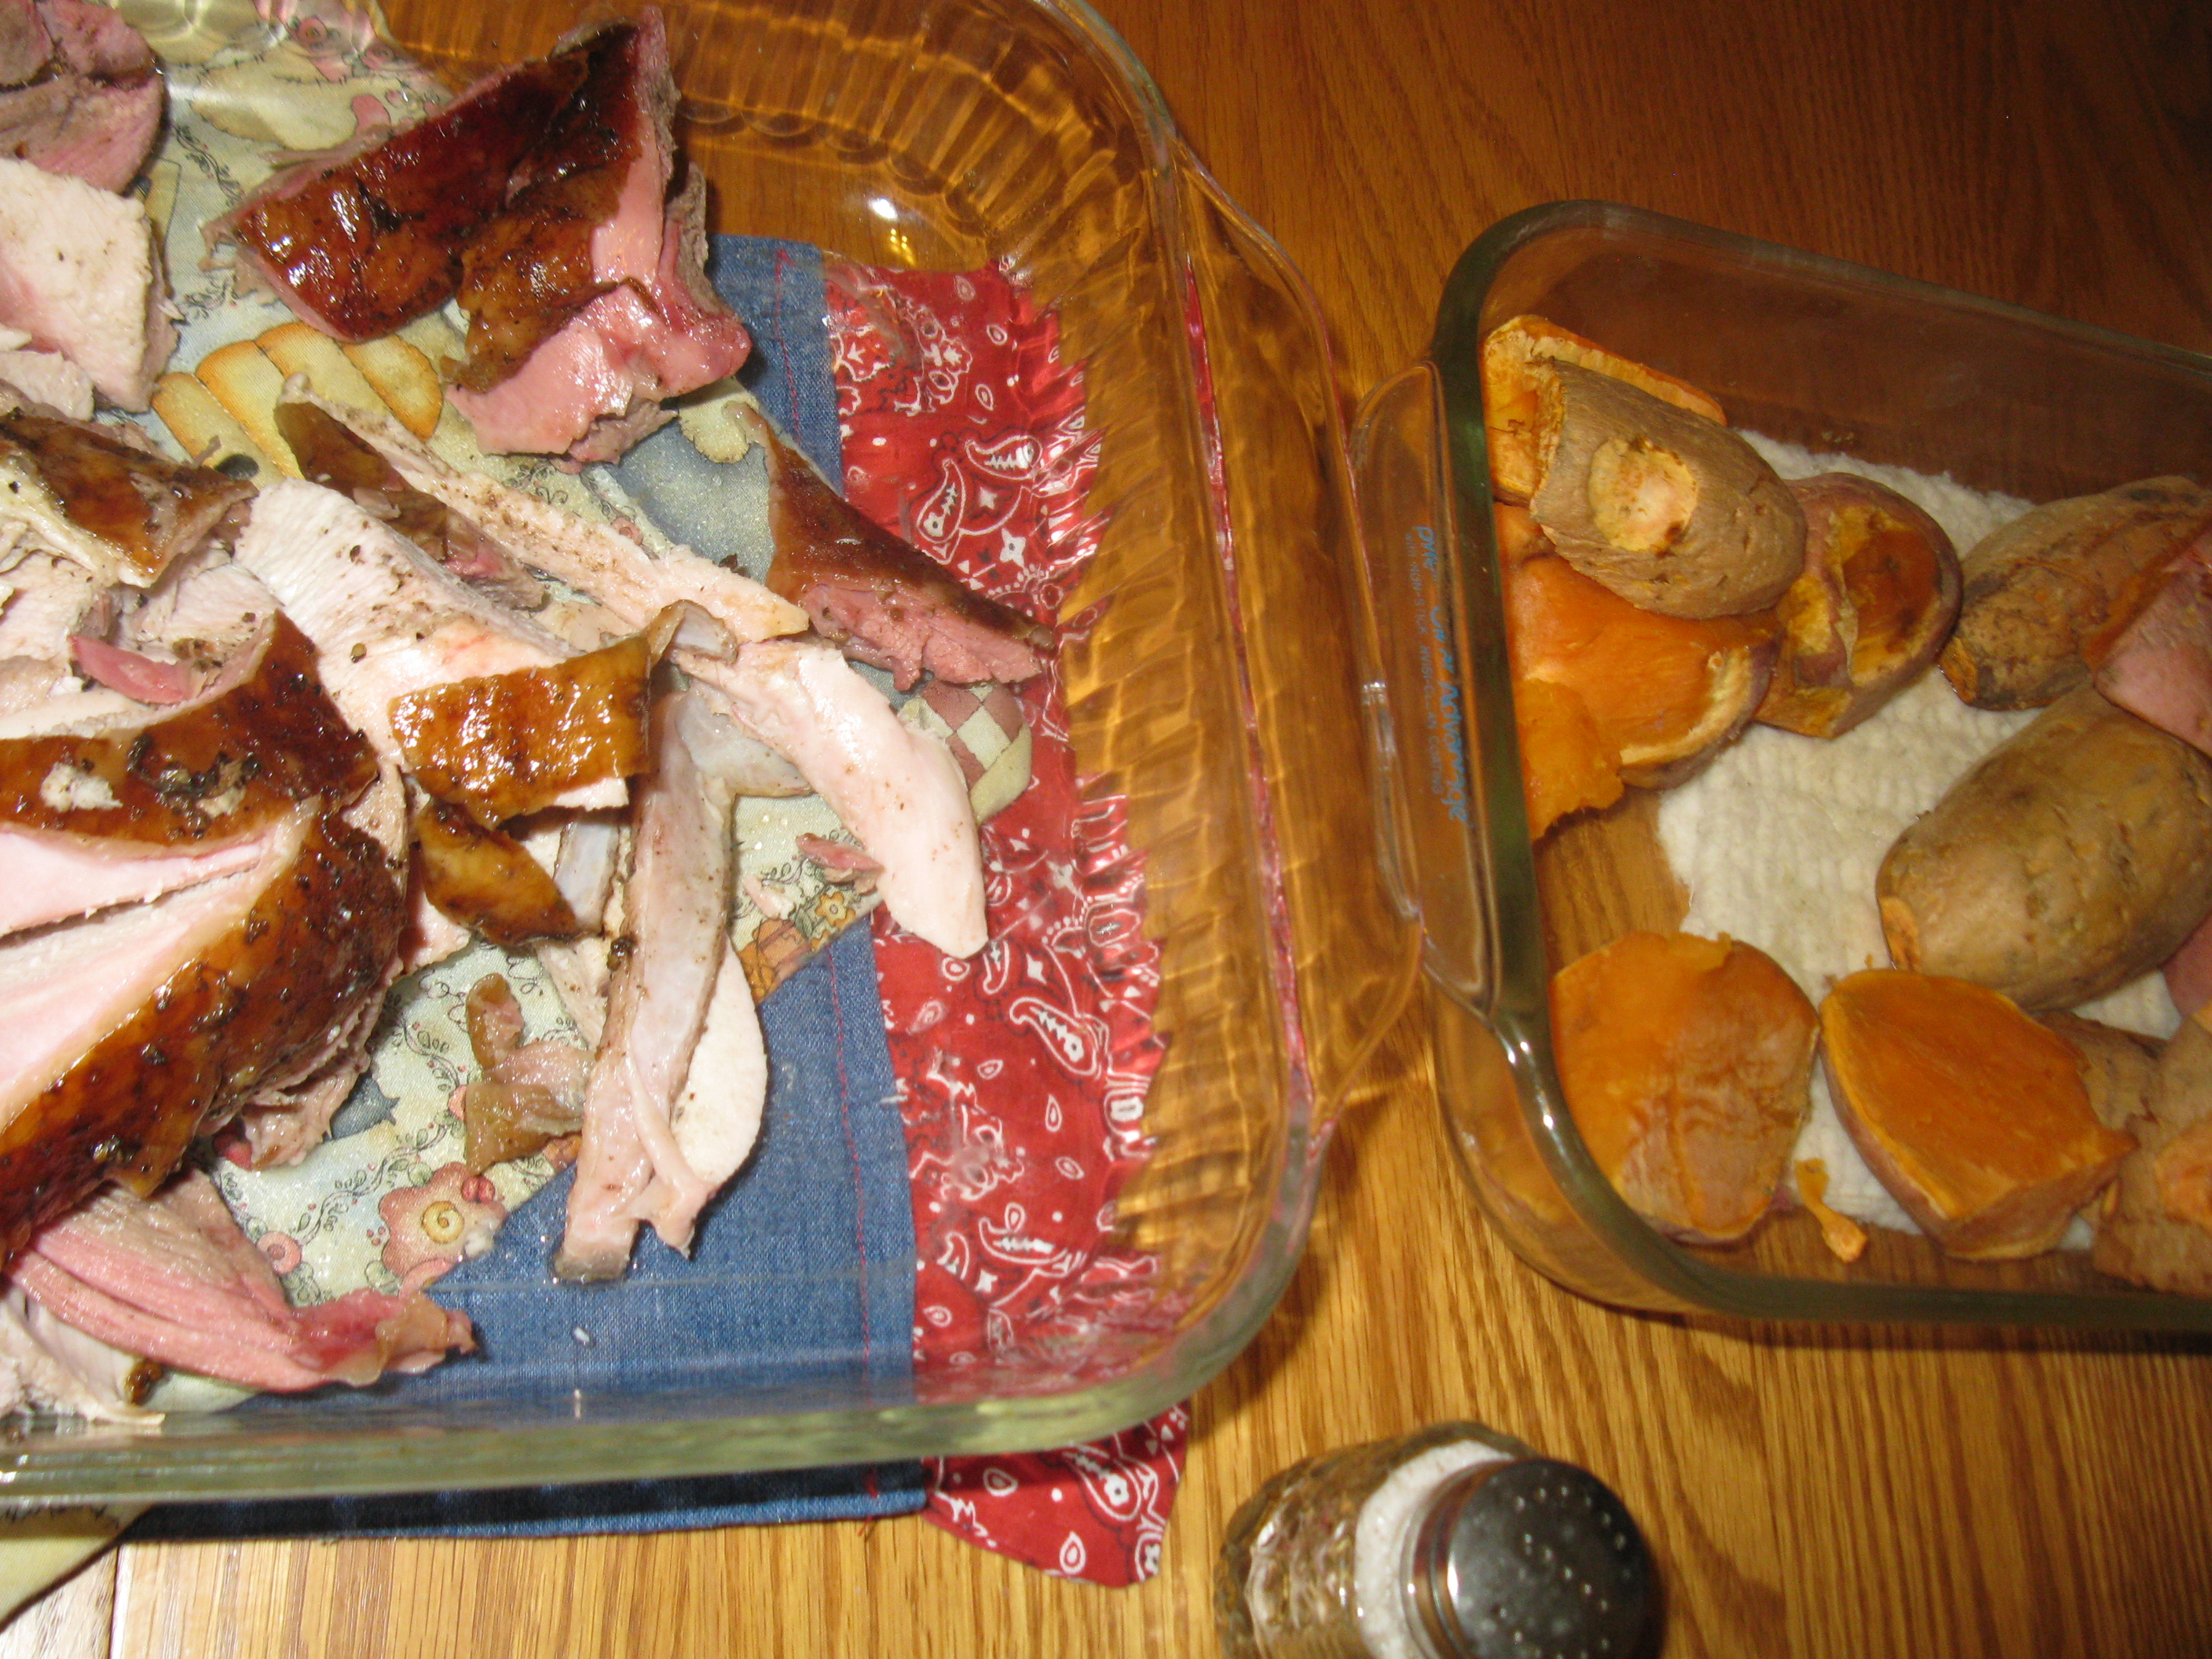
On the table along with sweet potatoes from the farm.
A great experience and meal. Happy Thanksgiving!
Here’s a video on carving your turkey. If your turkey is as dry as the one in the video, it’s not a heritage turkey from Blessing Falls Farm!